
What Supplies Make Wet Felting Easier and More Fun
When I begin a Wet Felting project, I grab some important supplies:
- Soft wool fibers (like merino)
- Gentle soap
- Warm water
- Something to press and rub (my hands, a mat, or a rolling tool)
These tools help turn a simple idea into something pretty. Good supplies make Wet Felting easier and more fun for all. > I think anyone can try Wet Felting, even if they are new. I enjoy trying new things and finding fun ways to make art.
Key Takeaways
- Use soft, high-quality wool like merino for smooth and easy felting results.
- Choose gentle soap, such as olive oil soap, to help fibers stick and protect your hands.
- Warm water opens wool fibers and speeds up the felting process without hurting your skin.
- Start felting with your hands and simple tools like mats or bubble wrap, then try new tools as you gain confidence.
- Use household items like pool noodles, bamboo mats, and netting to save money and make felting fun and creative.
Wet Felting Essentials

Wool Fibers
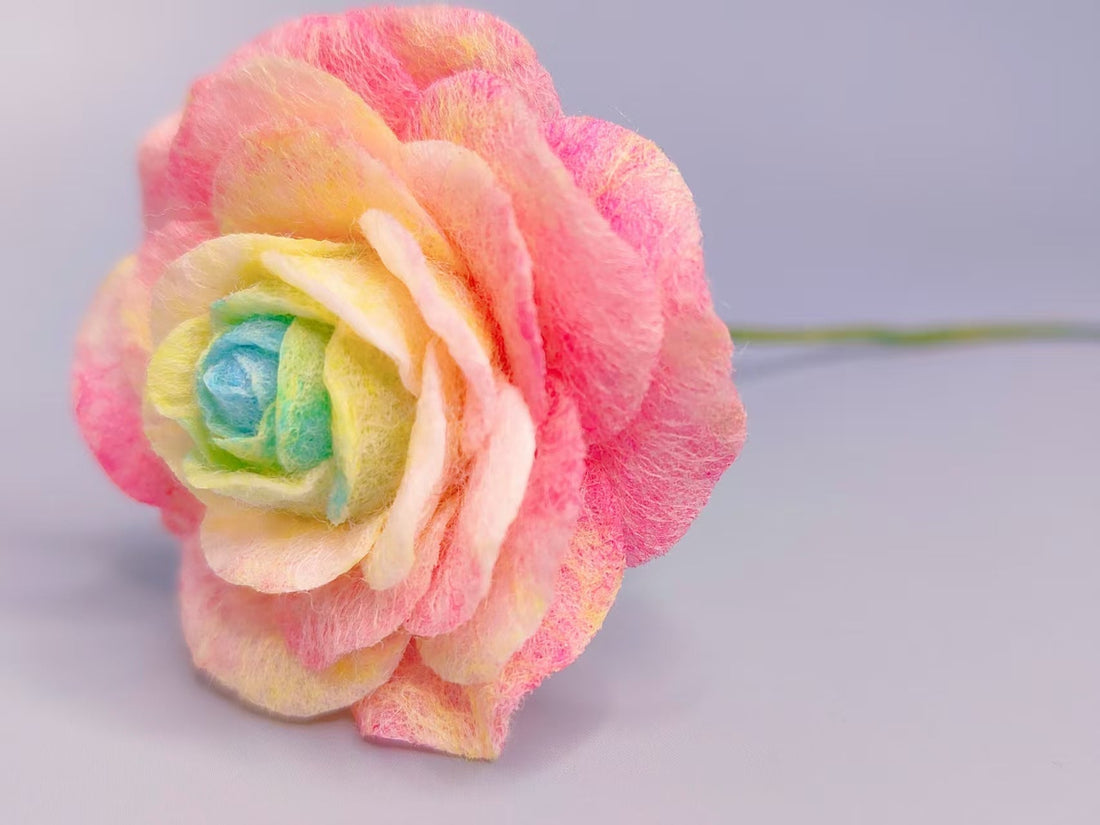
When I start a Wet Felting project, I always reach for high-quality wool. Merino wool stands out as my favorite. Its fine fibers feel soft and smooth in my hands. I learned that the tiny scales on wool fibers create friction when wet, which helps the fibers lock together. This friction is what makes felting possible. Scientific studies show that wet wool fibers have higher friction than dry ones. The scales act like tiny hooks, grabbing onto each other as I rub and press. Merino wool, with its fine diameter and softness, gives me the best results. I notice my projects turn out softer and more even when I use good wool. I look for wool roving that feels soft and has fibers about 3 to 4 inches long. This makes the felting process smoother and more enjoyable.
Tip: Try different types of wool, but start with merino if you want soft, beautiful results.
Soap
Soap plays a big role in Wet Felting. I use gentle soap to help the fibers slide and stick together. Olive oil soap has become my top choice. Many crafters and soapmakers suggest using olive oil soap because:
- It contains about 50% olive oil, which feels gentle on my hands.
- Some people add a bit of fiber to the soap for a silky touch.
- The smooth lather helps the wool fibers move and mesh without drying out my skin.
- Experimenting with olive oil soap can make the felting experience more pleasant.
I love how olive oil soap feels during felting. It makes the process easier and keeps my hands happy.
Water and Heat
Warm water brings the magic to Wet Felting. I pour warm water over my wool to open up the fibers. The heat helps the scales on the wool lift and grab onto each other. I always check that the water feels warm but not too hot. If the water is too cold, the fibers do not felt well. If it is too hot, I might hurt my hands. I find that the right temperature makes the felting process faster and more fun.
Agitation Tools
Agitation is the secret to turning loose wool into felt. I use my hands to rub and press the wool. Sometimes, I use a textured mat or a rolling pin to add more pressure. I even tried using an electric sander once, just at the start, and it made the process much easier. My hands did not get as tired, and the felt came together quickly. The right tool can help me create different textures and shapes. I like to experiment with mats, rolling surfaces, or even simple kitchen tools. Each one gives a unique result.
Note: Start with your hands and a mat. As you gain confidence, try new tools to see how they change your felting.
Helpful Tools

Bamboo Mats
Bamboo mats have become one of my favorite tools for Wet Felting. I roll my projects inside a bamboo mat to create even pressure. The mat’s natural texture helps agitate the wool fibers, making them stick together faster. I love how the bamboo mat keeps my work flat and stable. When I want to make a scarf or a flat piece, I always reach for my bamboo mat. Many starter kits include a small bamboo mat, but I have also used a clean bamboo sushi rolling mat from my kitchen. It works just as well.
Tip: If you do not have a bamboo mat, try using a placemat or a flexible cutting board.
Bubble Wrap
Bubble wrap makes Wet Felting easier and more fun for me. I lay it flat on a towel to create a stable, water-absorbing surface. The bumpy texture of the bubble wrap gives just the right amount of friction, which helps the wool fibers lock together. I place my wool on the bubble wrap, cover it, and then roll everything up tightly. This rolling action creates the agitation needed for felting, while the bubble wrap protects and stabilizes my project. I find that bubble wrap also helps contain water, keeping my workspace less messy. Although bubble wrap does not last forever, it is easy to find and works great for beginners.
- Bubble wrap provides a textured surface for friction.
- It stabilizes the work area and absorbs water.
- Rolling with bubble wrap protects and agitates the fibers.
Netting or Voile
Netting or voile is a simple but powerful helper. I place a piece of netting over my wool before adding water and soap. The netting holds the fibers in place, so they do not shift or move around. This makes it much easier to create neat edges and detailed designs. I can lift the netting to check my progress without disturbing the wool underneath. Sometimes, I use a piece of old sheer curtain or even a mesh laundry bag. These household items work just as well as craft store netting.
Pool Noodle
A pool noodle is a surprising but fantastic tool for Wet Felting. I use it as a rolling pin or as support for shaping 3D projects. Pool noodles are soft, lightweight, and easy to cut to any size. They help me roll my felt evenly and protect my hands from getting tired. When I work on sculptures or need to support small parts, I use a piece of pool noodle or foam. Pool noodles are affordable and easy to find, making them a great choice for anyone starting out. I have also tried using foam blocks and even rolled-up towels, but pool noodles give me the best results for rolling and shaping.
Note: Many of these tools come in starter kits, but you can also find great alternatives around your home. Experimenting with different tools has helped me discover new ways to enjoy Wet Felting.
Wet Felting Advanced Tools
Palm Washboard
When I want to speed up the felting process, I reach for my palm washboard. This small, ridged tool fits perfectly in my hand. I use it to rub the surface of my project, adding extra agitation. The grooves help the wool fibers lock together faster than with my hands alone. I notice that my felt becomes firmer and more even when I use the washboard. It saves my hands from getting tired and gives me more control over the texture. Sometimes, I use it to create special patterns by pressing harder in certain spots.
Tip: If you do not have a palm washboard, try using a textured soap dish or even the ridges on a plastic container.
Felting Stones
Felting stones feel smooth and cool in my hand. I use them to press and shape my felt, especially when I want a polished finish. The weight of the stone helps flatten bumps and smooth out rough areas. I love how the stone glides over the wool, making the surface look neat and professional. Felting stones also help me add gentle curves or edges to my work. Each time I use one, I feel like I am sculpting with nature’s own tools.
3D Forms
When I want to create shapes like bowls, hats, or even animal figures, I use 3D forms. These molds give my Wet Felting projects structure and help me shape the wool into complex designs. I learned that 3D needle-punching technology makes it possible to create strong, even shapes with good fiber distribution. This method works better than many other textile techniques because it is fast, versatile, and cost-effective. I have seen how 3D forms can improve the strength and look of my felted pieces. Some advanced projects, like solar water evaporators, use 3D felt structures to boost performance and efficiency. Using 3D forms inspires me to try new ideas and push my skills further.
- 3D forms help me:
- Shape wool into bowls, hats, and sculptures
- Achieve even fiber distribution for stronger felt
- Explore advanced designs with better performance
Hand Carders
Hand carders look like small paddles with wire teeth. I use them to blend different colors of wool or to fluff up fibers before felting. When I want a smooth gradient or a custom color mix, I reach for my carders. They help me prepare the wool so it felts evenly and looks beautiful. Blending fibers with hand carders gives me more creative freedom and makes each project unique. Sometimes, I use them to recycle leftover wool, turning scraps into something new and exciting.
Note: Specialty rollers and resist materials can also help create texture and 3D effects. I love experimenting with these tools to see what new shapes and patterns I can make.
Choosing and Using Supplies
Economical Options
When I started Wet Felting, I wanted to keep costs low. I found that many basic supplies come from things I already had at home. Here are some budget-friendly choices I use:
- Bubble wrap (the wider, the better) works as a felting mat, though it wears out over time.
- Pool noodles help me roll and press my projects without spending much.
- Old towels, sponges, and plastic bags help manage water and keep my space tidy.
- Liquid dish soap or Murphy’s Oil Soap makes a great substitute for specialty felting soap.
I learned that starting with these simple items helps me focus on learning the process. As I grow more confident, I can add new tools.
Household Alternatives
I love finding new uses for everyday things. Mesh screens from old windows, plastic containers, and even a spray bottle make Wet Felting easier. I use a mesh laundry bag or sheer curtain as netting. Sometimes, I use a mop to clean up water spills. These household items let me experiment without spending extra money.
Tip: Look around your home before buying new supplies. You might already have what you need!
When to Upgrade
As my skills improved, I noticed when it was time to invest in better tools. I upgraded to a bamboo mat for smoother rolling and a palm washboard to save my hands. For larger projects, I switched to a solar pool cover, which lasts longer than bubble wrap. I also bought hand carders for blending fibers. I always wait until I feel ready for the next step. This way, I balance my budget and my excitement for new projects.
Storage Tips
Keeping my wool safe matters to me. I always clean or treat my wool before storing it. I use sealed plastic tubs or suitcases with tight zippers to keep out moths. During cold months, I sometimes store wool outside to freeze any pests. I avoid airtight plastic bags for long-term storage, since wool needs to breathe. I check my supplies often and clean containers to keep everything fresh.
- Store cleaned wool in sealed tubs or suitcases.
- Use cold storage in winter to protect from moths.
- Avoid airtight bags for long-term storage.
- Inspect and air out wool regularly.
I find that the right supplies make every project smoother and more exciting. My favorite tools help me create beautiful art and enjoy the process. I always try new tools and setups to see what works best for me. When I explore different options, I feel more creative and confident. Every project gives me a chance to learn and grow. Let’s keep making, exploring, and having fun with our felting adventures! 🌟
FAQ
What kind of wool works best for wet felting?
I always choose merino wool for my projects. It feels soft and felts quickly. I love how it creates smooth, even surfaces. Other wools work too, but merino gives me the best results every time.
Can I use regular soap for wet felting?
Yes, I sometimes use gentle dish soap or hand soap. Olive oil soap feels best on my hands and helps the fibers felt smoothly. I avoid harsh soaps because they can dry out my skin and damage the wool.
How do I keep my workspace tidy during wet felting?
I lay down old towels to catch water and soap. I keep a sponge nearby to wipe up spills. Staying organized helps me focus on creating, not cleaning. A tidy space inspires me to keep going!
What should I do if my felt won’t stick together?
I add more warm water and rub the wool with my hands or a mat. Sometimes, I use a little more soap. I keep working until the fibers lock. Patience and gentle pressure always help me succeed.
See Also
Top Reasons Wool Felt Excels In Crafting And Decorating